When to Replace Your Brake Rotors: A Complete Guide for Every Driver

Understanding the signs, costs, and options for one of your car’s most critical safety components

You’re driving down the road, approaching a red light. You press the brake pedal, and instead of the smooth stop you expect, you feel a pulsation under your foot. Or maybe you hear a high-pitched squeal that makes you sink a little lower in your seat. These moments are your car’s way of telling you something important about your brake rotors.
Brake rotors—or brake discs, as they’re more commonly called in Europe and other regions—are the large metal components clamped by your brake pads to stop your wheels from turning. While most drivers know to replace brake pads regularly, rotors often get overlooked until problems become impossible to ignore. Understanding when to replace your brake rotors can save money, keep you safer, and help you avoid more expensive repairs down the road.
What Brake Rotors Actually Do
Every time you press the brake pedal, your brake pads squeeze against the rotors with tremendous force. This friction converts your vehicle’s kinetic energy—its forward motion—into heat, slowing the wheels and bringing you to a stop. It’s a simple process, but the demands are extreme. Your rotors endure intense heat, pressure, and abrasion every time you drive.
Because rotors are exposed to the elements and subject to constant wear, they don’t last forever. The typical steel rotor lasts somewhere between 30,000 and 70,000 miles, depending on your driving habits, vehicle weight, and the quality of parts you choose. For most drivers, that means replacing rotors every second or third brake pads change. When you do a complete brake job, inspecting both pads and rotors is essential for safety.

5 Signs Your Rotors Need Attention
1. Vibration or Pulsation When Braking
This is the most common warning sign. If you feel a rhythmic pulsing in the brake pedal or a shaking sensation in the steering wheel when you slow down, your rotors are likely uneven. Many people call this “warped rotors,” though the reality is usually uneven wear or material transfer from the pads creating high and low spots on the rotor surface.
What it feels like: A shudder or vibration that becomes more noticeable the harder you brake.
2. Unusual Brake Noises
Not all brake noises are the same, and knowing the difference matters:
-
Squeaking or squealing often comes from wear indicators on your brake pads. It’s a designed alert that your pads are getting thin—replace them soon to protect your rotors.
-
Grinding or growling is an urgent warning. This metal-on-metal sound means your brake pads have worn completely through, and the steel backing plate is now grinding directly against the rotor. Driving with grinding brakes can destroy rotors in just a few miles and seriously compromise stopping power.
-
Low-speed noise may come from rust buildup if your car sat parked for a while, or from debris caught between the pad and rotor. Sometimes a short drive clears it up; persistent noise needs inspection.
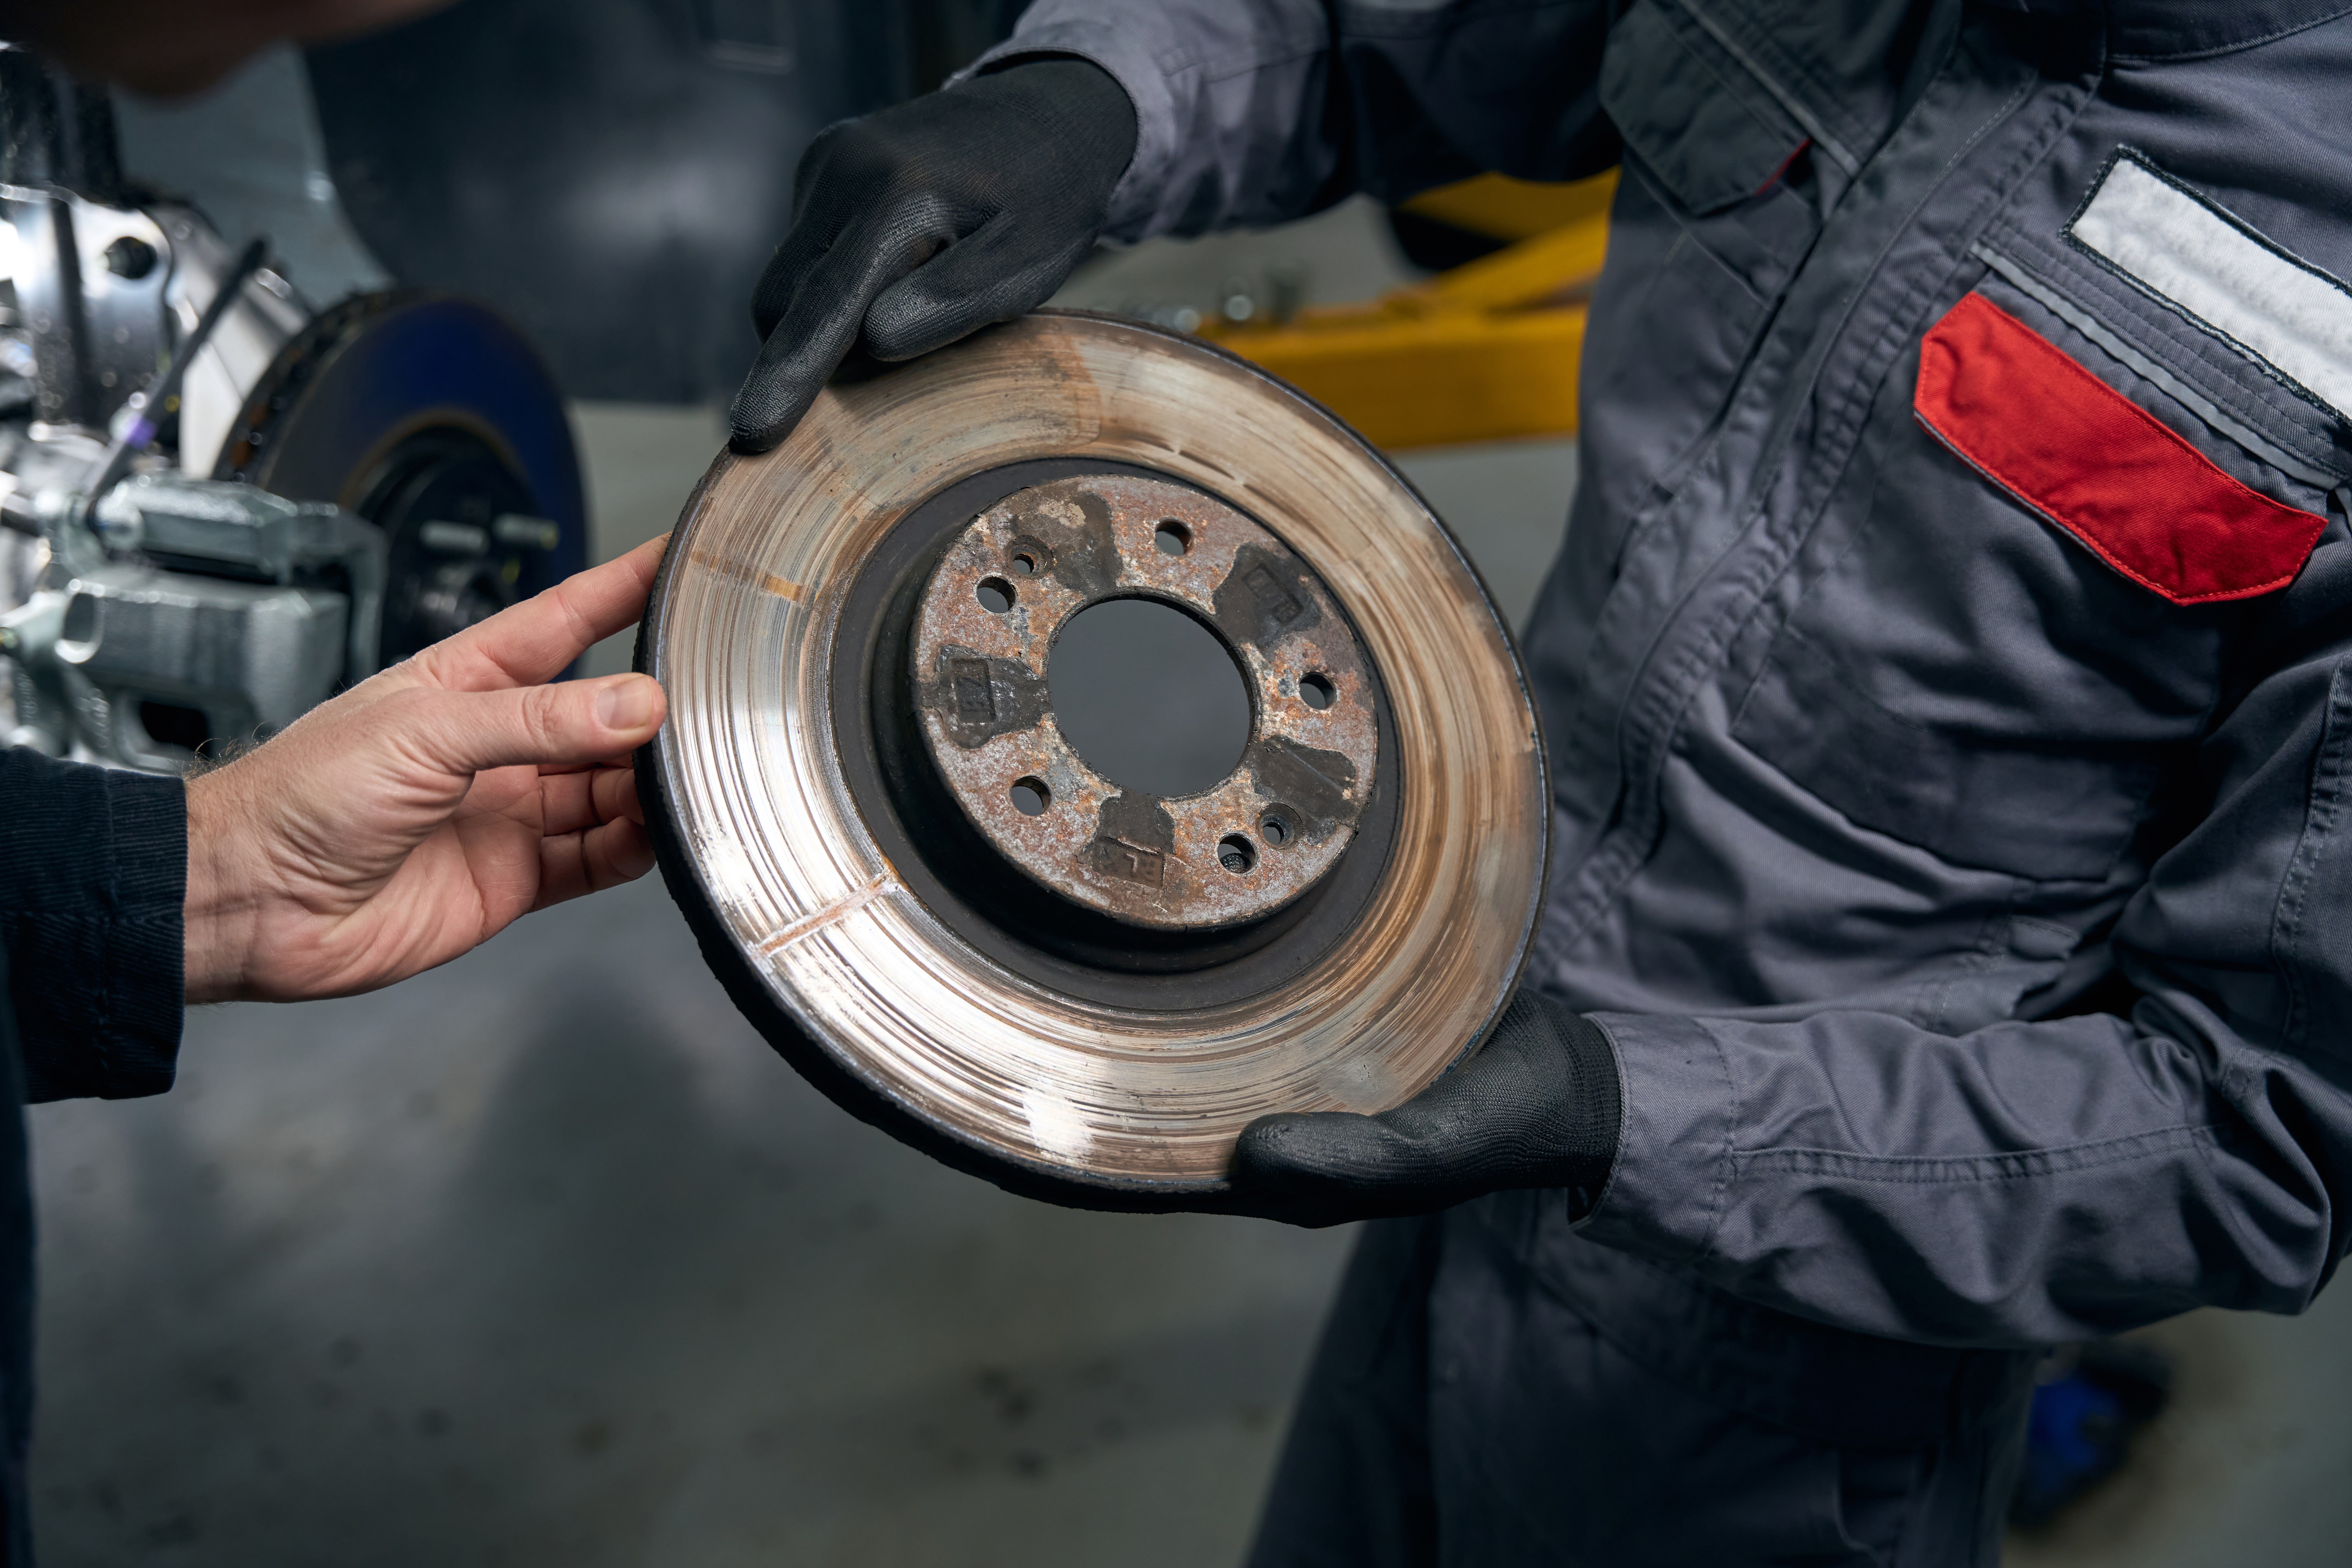
3. Visible Damage
Take a look through your wheels at the brake rotor. The surface should be relatively smooth and shiny. Signs of trouble include:
-
Deep grooves or scoring that you can feel with your fingernail
-
Cracks, especially those reaching the outer edge of the rotor
-
A pronounced lip around the outer circumference, indicating significant wear
-
Blue or discolored spots, which show areas of extreme overheating
Any of these mean replacement is necessary—resurfacing won’t fix structural damage. Installing new brake pads on old, scored, or uneven rotors will quickly ruin the new pads, and using grooved rotors with new pads can cause the pads to wear faster and may lead to wobbling wheels.
4. Reduced Braking Performance
If your car feels like it takes longer to stop, or you have to press the pedal harder than usual, your rotors may be worn beyond their effective service life. Worn rotors also manage heat poorly, increasing the risk of brake fade during extended downhill driving or heavy braking situations.
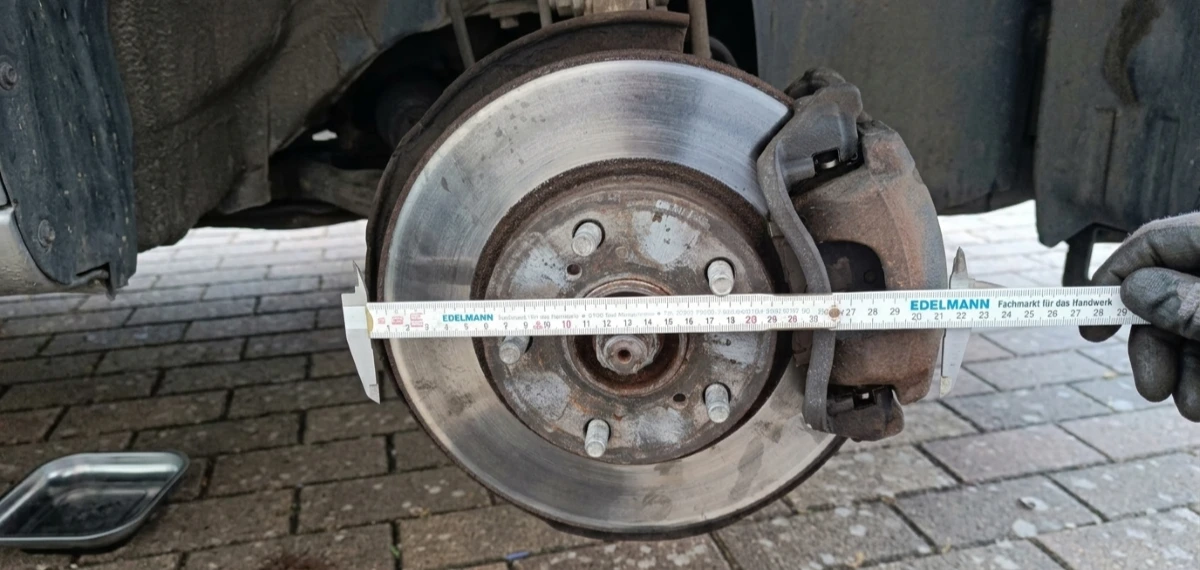
5. Measured Thickness Below Spec
This is the most objective measure. Every rotor has a minimum thickness specification cast into the metal. During a brake service, a technician measures rotor thickness with a caliper. If the rotor is at or below the minimum, it must be replaced—even if it looks fine. A qualified mechanic at a service center can perform this inspection quickly.
How Long Should Rotors Last?
There’s no universal mileage number for rotor replacement. Instead, longevity depends on several factors:
-
Driving style: Frequent hard braking, tailgating, or driving in mountainous areas wears rotors faster.
-
Vehicle use: Towing, carrying heavy loads, or using your vehicle for rideshare service increases brake demands.
-
Parts quality: Premium rotors matched with pads typically last longer.
-
Maintenance timing: Replacing brake pads before they wear completely out prevents unnecessary rotor damage.
-
Environment: Road salt and coastal humidity accelerate corrosion.
A reasonable expectation for most drivers: inspect rotors with every brake pads change, plan to replace them every 50,000 to 70,000 miles, or after two to three pad replacements. This approach to vehicle maintenance helps avoid unexpected brake job costs.
Types of Brake Rotors: Design Variations and Configurations
When it’s time to replace, understanding the different design variations helps you choose the right option for your driving needs. Brake rotors and discs come in various configurations, each offering unique benefits in terms of heat dissipation, weight reduction, and braking performance. Here are the most common types:
- Solid Rotors feature a continuous, unbroken friction surface. They’re commonly used in standard passenger vehicles and light-duty applications. Solid rotors offer simplicity, durability, and cost-effectiveness—making them perfect for everyday commuting. However, they may be more prone to heat buildup and brake fade under heavy braking conditions.
- Vented Discs incorporate channels or vanes between the friction surfaces, allowing for improved heat dissipation and airflow. This design helps reduce brake fade and maintain consistent braking performance, particularly in high-performance or heavy-duty applications. Many modern vehicles come equipped with vented rotors on the front brakes, where braking demands are highest.
- Slotted Discs feature machined slots or grooves on the friction surface. These slots help expel gas and debris generated during braking, preventing brake pad glazing and maintaining optimal friction between the pads and disc surface. The result is improved braking performance and better pedal feel. Slotted rotors are especially useful for trucks that tow or vehicles driven in hilly terrain.
- Drilled Discs have holes drilled into the friction surface, which serve to dissipate heat and reduce brake fade. While drilled rotors offer improved heat dissipation and a distinctive aesthetic, they may be more prone to cracking under extreme braking conditions. For this reason, they’re typically reserved for high-performance or racing applications.

Each rotor type has its own strengths, and the best choice depends on your driving style and vehicle use. For most daily drivers, quality solid or vented rotors offer a reliable balance of performance and value. If your driving involves sustained high‑speed braking or you simply prefer the sporty look and enhanced cooling of drilled rotors, they are a legitimate option—just be aware they are engineered for more demanding conditions.
Replacement Cost and Options
Cost varies widely based on vehicle, parts quality, and whether you do the work yourself:
-
Parts only: Aftermarket rotors typically cost $30 to $75 each
-
Professional replacement: Expect $300 to $800 per axle, including pads, rotors, and labor
-
Luxury or performance vehicles: Costs run higher
Resurfacing (turning rotors on a lathe) costs $15 to $40 per rotor and can extend life if enough material remains. However, modern rotors are thinner than older designs, leaving less margin for resurfacing. Many shops now recommend replacement for safety and simplicity.


Should You DIY or Hire a Pro?
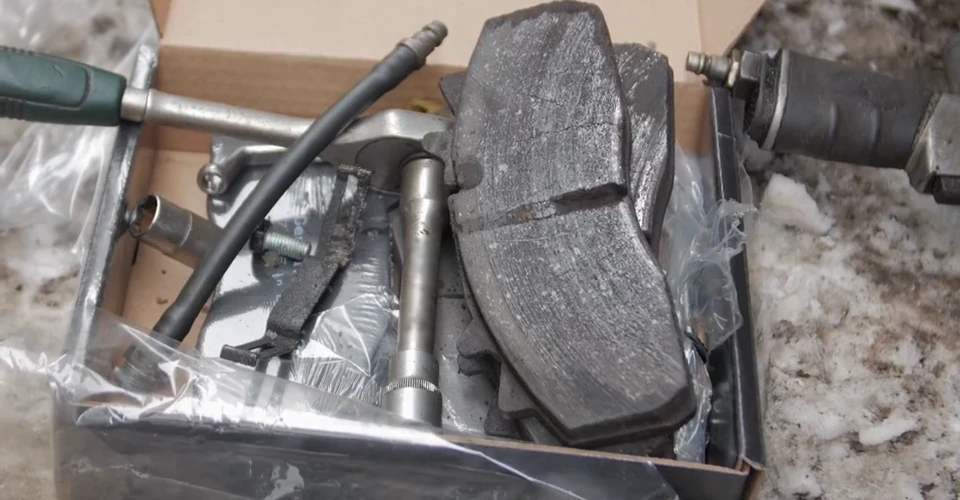
Replacing brake rotors is a moderate-difficulty job. You’ll need:
-
Essential tools: a floor jack, jack stands, socket set, torque wrench, caliper compressor, and cleaners
-
Safety equipment: a floor jack, jack stands, and wheel chocks
-
Socket set, breaker bar, and torque wrench (common socket sizes for rotor replacement range from 12mm to 17mm, or may include hex or Torx bits)
-
Brake caliper compression tool or C-clamp
-
Brake cleaner and appropriate lubricants
-
A few hours of uninterrupted time
If you have these tools and previous mechanical experience, DIY saves labor costs and gives you confidence in your work. If you’re missing tools, unsure about any step, or the vehicle shows rusted components, hiring a professional is the safer choice. Brakes are too critical for guesswork.
Here’s a quick overview of the process:
-
Lift the vehicle safely with a hydraulic jack and secure with jack stands
-
Remove the wheel to access the brake assembly
-
Unbolt the brake caliper and caliper bracket; use a wire to hang the caliper without stressing the brake hose
-
Remove the caliper hardware and old pads
-
Slide off the old rotor; clean the hub surface with a wire brush to remove rust
-
Install the new rotor and new brake pads (make sure the pads rest properly in the caliper assembly to ensure correct alignment)
-
Compress the caliper piston using a proper tool—you may need to push the piston back into the caliper to make room for the new pads
-
Reinstall the caliper and caliper bracket, then tighten bolts to spec
-
Torque lug nuts properly after reinstalling the wheel
Before driving, press the brake pedal several times until it feels firm. This ensures the caliper piston is properly seated against the new pads.
The Break-In Process Matters
New rotors and pads need to be bedded in—a process that transfers a thin, even layer of pad material onto the rotor surface. Skipping this step can lead to noise, vibration, and reduced pad life. This break-in procedure is sometimes called burnishing.
The basic procedure: after installation, find a safe stretch of road, accelerate to about 35 mph, and brake moderately down to 5 mph without coming to a complete stop. Repeat 5 to 10 times, allowing cooling time between stops. Follow the specific instructions that came with your parts. A quick video tutorial can also help visualize this process.
Making Your Rotors Last
Once you have new rotors, these habits protect your investment:
-
Change brake pads promptly when they reach 3mm of friction material left
-
Avoid aggressive braking when possible—anticipate stops and coast
-
Clean wheels regularly to prevent brake dust buildup
-
Have brakes inspected at least annually or with every oil change
-
Address noise immediately—small problems become expensive repairs quickly
-
Consider a brake fluid flush as part of regular vehicle maintenance to maintain brake system performance
The Bottom Line
Your brake rotors are essential safety components that require periodic replacement. Pay attention to how your brakes feel and sound. A pulsating pedal, steering wheel shake, or grinding noise means it’s time for inspection. Replacing rotors when needed, using quality parts, and following proper installation procedures keeps your braking system reliable.
Most drivers will replace rotors two or three times over the life of a vehicle. With proper care and attention to warning signs, you’ll know exactly when the time comes—and you’ll be able to stop safely every time you need to. Whether you choose to do the job yourself or visit a service center, staying proactive about your brakes is one of the smartest investments in your safety on the road.


