How do I properly bed in new brake pads and rotors?

Properly bedding in your new A-Premium brake pads and rotors is the essential final step to ensure your vehicle achieves peak stopping performance and long-term durability on the road.
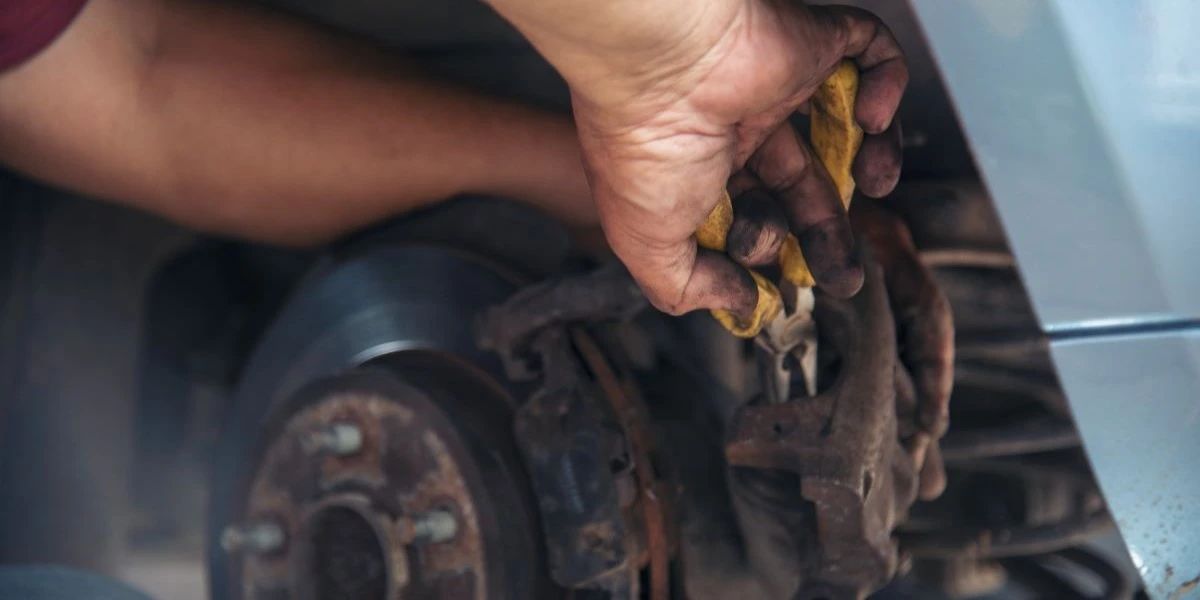

So, you finally pulled the trigger on that much-needed upgrade for your vehicle. You spent the afternoon in the garage, your hands are covered in grease, and you’ve successfully managed to replace your old, squeaky components with a shiny new set of brake pads and rotors. You’re ready to hit the road and test out that improved stopping power, right?
Not so fast.
Before you start driving like you’re qualifying for the pole position, you need to "bed in" your brakes. Whether you bought a high-performance kit or a standard OE replacement, the bedding-in process—also known as burnishing—is the most critical step to ensure your braking system performs as designed.
Why Bedding In Your Brakes Matters
When you install a new brake kit, the surfaces of the brake pads and the brake discs aren’t perfectly matched yet. Bedding them in creates a "transfer layer" of friction material from the pads onto the rotors.
If you ignore this, you’ll likely experience:
-
Inconsistent performance from your vehicle.
-
Annoying squeals and vibrations.
-
Reduced lifespan for your pads and rotors.
-
Uneven wear that might force you to order new parts sooner than expected.
Whether you drive a heavy-duty model for work or a nimble daily driver, getting this right is essential for your vehicle safety.
The Step-by-Step Bedding Process
Before you start, ensure your wheels are torqued correctly and your calipers are secure. Find a quiet stretch of road where you can safely reach moderate speeds without being a nuisance to other vehicle traffic.
1. The Initial Warm-Up
Start by driving your vehicle at about 30 mph. Gently apply the brakes a few times to bring the braking system up to operating temperature. You want the stock components to warm up gradually.
2. The Moderate Stops
Increase your vehicle speed to 45 mph. Apply firm pressure to the brakes to slow the vehicle down to 10 mph. Do not come to a complete stop! If you stop completely while the pads are hot, you risk leaving an uneven deposit on the rotors, which leads to "warped" sensations. Repeat this 5–8 times.
3. The Higher-Speed Cycles
If you have a high-performance kit or trucks that carry heavy loads, you may need a more aggressive cycle. Speed up your vehicle to 60 mph and brake hard down to 15 mph. You might even smell the brakes getting hot—that’s normal. It means the shims and friction material are doing their job to fit and match the surface of the rotors.
4. The Cool-Down Phase
This is the most important part for your vehicle. Drive for 10–15 minutes at highway speeds without using the brakes much. This allows the brake pads and rotors to cool down evenly.

Evaluation Standards: Is Your Bed-In Successful?
So, you’ve hit the road, followed the heating cycles, and allowed your vehicle the proper time to cool down. But how do you know if your brake pads and rotors actually crossed the finish line? Identifying a successful bed-in is part science and part intuition.
If you’ve just performed an upgrade on your daily driver or heavy-duty trucks, look for these three scientific markers to ensure your braking system is performing exactly as designed.
1. Noise Elimination: The Sound of Silence
A silent braking system is the first sign of a professional install. During the initial driving phase, it’s normal to hear a slight "scrubbing" sound as the brake pads begin to match the surface of the brake discs. However, once the bed-in is complete:
-
Sharp Squeals Should Vanish: High-pitched noises usually occur when the pads vibrate against the calipers. Properly seated shims and a well-developed transfer layer should dampen these vibrations.
-
No More "Grinding": Any rough, metal-on-metal sounds should disappear as the stock irregularities on the rotors are worn smooth.
-
Consistency: Whether you are at a slow stop or braking from highway speeds, the brakes should remain quiet. If the noise persists, you may need to find a shop to inspect the fit of your kit.
2. Consistency of Feel: Predictable Stopping Power
Your vehicle should communicate through the brake pedal. When you replace old parts with a new brake kit, the difference in performance should be immediate and consistent.
-
Firm Pedal Feel: The "spongy" feel of old brakes should be gone. A successful bed-in ensures the pads are making flat, full contact with the rotors.
-
Predictable Response: You should be able to find exactly how much pressure is needed for a smooth stop. If the vehicle pulls to one side, the pads and rotors on one of your wheels might not be bedded in as effectively as the other.
3. Wear Uniformity: The Visual Inspection
Grab a flashlight—or use natural lighting—and look through the spokes of your wheels. The physical appearance of the brake discs tells the real story of the match between your pads and rotors.
-
The Blue/Grey Tint: A successfully bedded rotor often develops a subtle, uniform discolored tint (often light grey or slightly bluish). This is the "transfer layer" of friction material that was designed to move from the pads to the rotors.
-
Smooth Surface: You shouldn't find deep grooves or "hot spots" (bright, shiny patches). The surface should look even from the inner hub to the outer edge of the rotors.
-
Clean Calipers: While some dust is normal, excessive, uneven piling of dust on the calipers can indicate that the pads aren't wearing down as designed.
Finding the Right Parts for Your Vehicle
Not every kit is built the same. When you shop for a replacement, you need to ensure the fit is perfect for your specific model.
|
Feature |
OE Replacement |
Aftermarket Car Parts |
|
Availability |
Dealer Only |
Easy to Order Online |
|
Performance |
Standard Stock |
Enhanced Durability |
|
Pricing |
High Markup |
Competitive Pricing |
|
Fitment |
Guaranteed |
Designed for Exact Fit |
|
Range |
Limited to Original Specs |
Wide Range for All Trucks/Cars |
Upgrading your braking system doesn’t mean you’re stuck with dealership prices or limited stock options. Choosing high-quality aftermarket autoparts is often the smartest way to replace worn components while actually securing a performance upgrade.
The beauty of the aftermarket is the range of choice. While OE parts are built to meet basic requirements, premium aftermarket brake kits are often designed to solve common issues—like excessive dust or premature warping—that the original model might have faced.
Why Choose A-Premium for Your Next Brake Job?
When you shop for rotor kits, you want a source that understands the balance between pricing and precision. A-Premium has become a go-to for many DIYers and professionals because their parts are engineered to meet or exceed OE replacement standards.
Whether you are looking for pads and rotors for a heavy-duty truck or a reliable daily driver, A-Premium offers several advantages:
-
Precision Fit: Each kit is manufactured to the exact dimensions of your vehicle, ensuring the pads sit perfectly against the calipers.
-
Ready to Install: Their rotor kits often come with all the necessary hardware, including shims to reduce noise, making the install process seamless.
-
Cost-Effective Performance: You get Brembo-level attention to detail without the "big brand" markup, allowing you to find a high-quality upgrade that fits your budget.


Making the Final Decision
When it’s time to order, don’t just settle for the first set of rotors and pads you find. Look for aftermarket autoparts that offer a clear path to better driving. By choosing a trusted brand like A-Premium, you aren't just buying parts; you're investing in the long-term safety and stopping power of your vehicle.
Learn more about how the right brake pads and rotors can transform your commute—and don’t forget to follow the bedding-in steps once those new parts are on the wheels!
Does your current braking system feel like it’s ready for an upgrade, or are you just looking for a more reliable OE replacement?
Pro-Tips for Long-Lasting Brakes
To keep your vehicle stopping on a dime, remember:
-
Check the Fit: Ensure the pads fit perfectly into the calipers.
-
Watch the Labor: If you aren't doing the install yourself, ensure the shop understands your performance expectations.
-
Financing: Many online retailers now allow you to order with a competitive APR to spread out the cost of a full brake kit. Always check the APR details in the checkout form before you complete the order. Keeping your APR low makes a premium upgrade much more affordable.
-
Consistency: Every vehicle in your fleet should follow a similar maintenance range.
Properly bedding in your brakes isn't just about performance; it’s about protecting the investment you made in your vehicle. Take the time to do it right, and your vehicle will thank you every time you hit the stop pedal.
Ready to upgrade? Learn more about our latest offerings and find the perfect fit for your vehicle today. With a wide range of rotor kits, there’s no better way to get back on the road safely.
Have you noticed a difference in how your vehicle feels after a proper bedding-in session?

Frequently Asked Questions
How long does the bedding-in process take?
The actual driving portion on the road usually takes about 20 to 30 minutes. However, the cooling time is just as important. After the heating cycles, your vehicle must sit until the brakes and wheels are cool to the touch. Rushing this can cause the pads to "imprint" onto the rotors, which often feels like a "warped" rotor. When you order your rotor kits, find a quiet area to perform this to avoid traffic issues.
Why does my braking system smell or smoke after I install new parts?
It is common for new brake pads and rotors to emit a slight odor or small amount of smoke during the first few heat cycles. This is the designed reaction of the resins in the pads and the protective coating on the brake discs. As long as your wheels are turning freely and your calipers are not sticking, this is a normal part of how the parts fit together. If you are working in a garage, ensure you have proper lighting to inspect the shims and hardware for any debris before your first road test.
Why choose A-Premium over stock OE?
A-Premium offers a massive range of aftermarket autoparts designed to match the exact specifications of your vehicle's model. Unlike stock parts that only meet the bare minimum, these rotor kits often feature improved metallurgy for better heat dissipation. When you find the right fit for your vehicle, you'll notice that A-Premium pricing is much more competitive than the dealer.


